
I do a good bit of macro pictures within the studio, for each scientific and inventive functions. I’ve used tripods, growth poles, and enormous copy stands to get the digital camera in shut. The setups have been typically difficult, and I generally felt I used to be concentrating extra on the gear than the {photograph}.
There are lots of macro and duplicate stands on the market, however I needed to construct a greater one, utilizing solely off‐the‐shelf elements, at a aggressive value. I needed it to be secure and have attachment factors for staging and lights. After a number of iterations, I had a design I favored. Once I added a few articulating arms, it appeared like a T‐Rex. So, that’s what I named it. And, given the stand makes use of T‐slot extrusions, the identify appears apt.
The T‐Rex in Motion
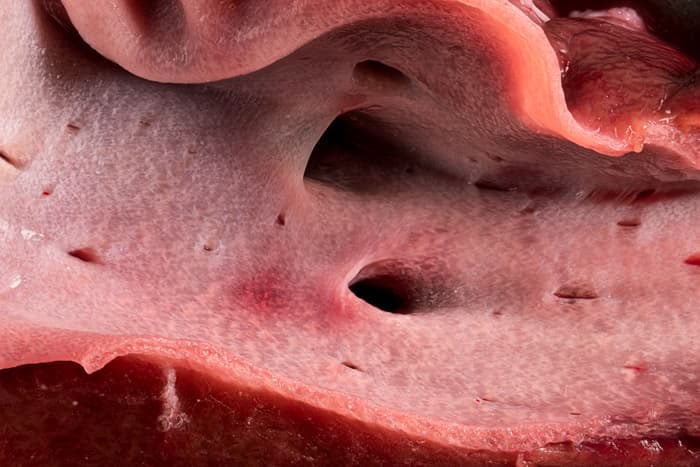
I’ve used the stand for photographing tissue samples for veterinary pathology That is a picture of a bile duct in a sheep liver. The sphere of view is about 1.4” (35 mm) huge.
I desire steady lighting for my macro work; I’ve used small LED panels, LitraTorches, and even small LED flashlights. I connect them with an umbrella mount or on an articulating arm utilizing T‐nuts. I’ll write about my lighting methods in a future put up.
You’ll be able to stage most any small topic with this stand. I additionally use the stand once I’m not doing macro work. A 35 mm lens may give you a couple of 20” (50 cm) area of view. Typically I mount a ball head on the stand to get the digital camera farther out from the vertical rail, and to let me change the angle of the view. I’ve even used the stand to carry topics for images whereas the digital camera was mounted on a tripod.
Stability
A precedence for me is stability. I don’t need to fear about knocking over the setup whereas working. The underside horizontal rail is over 5 kilos (2.3 kg), retaining the middle of mass low. This enables the vertical rail to be 24” tall (610 mm), on a footprint that’s solely 11” huge (280 mm). The stand is rock stable. If you need extra top you would possibly want a heavier or wider base.
Minimizing vibration is essential. As a result of I take advantage of steady lighting and apertures round ƒ/8, shutter speeds are sluggish. So, once I place the digital camera on the top of a growth or lengthy put up, even a small quantity of vibration induces noticeable blur. The rigidity and mass of the stand, plus the vibration-dampening ft, go a good distance in the direction of controlling vibration. Additionally, it’s not attainable to take away all vibration, so having your digital camera and topic firmly related permits them to vibrate in sync.
Excessive Macro
I do some excessive macro pictures, utilizing microscope goals mounted on the digital camera rather than the same old lenses. (I’ll write about that approach in one other article.) It takes little or no vibration to wreck an excessive macro {photograph}, and the solidity of the T‐Rex is essential.
For excessive macro, I take advantage of the computer-controlled WeMacro rail to seize focus stacks, and the Swebo LS001‐4w XY stage to place the topic. I connect them to the T‐Rex utilizing dovetail rails and clamps.
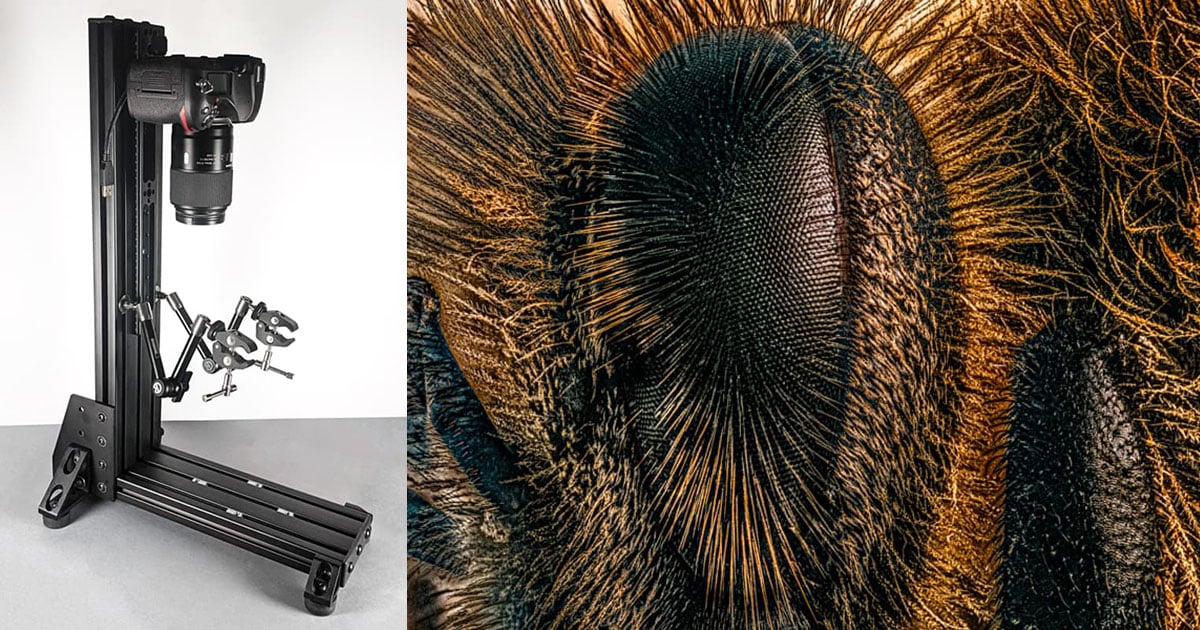
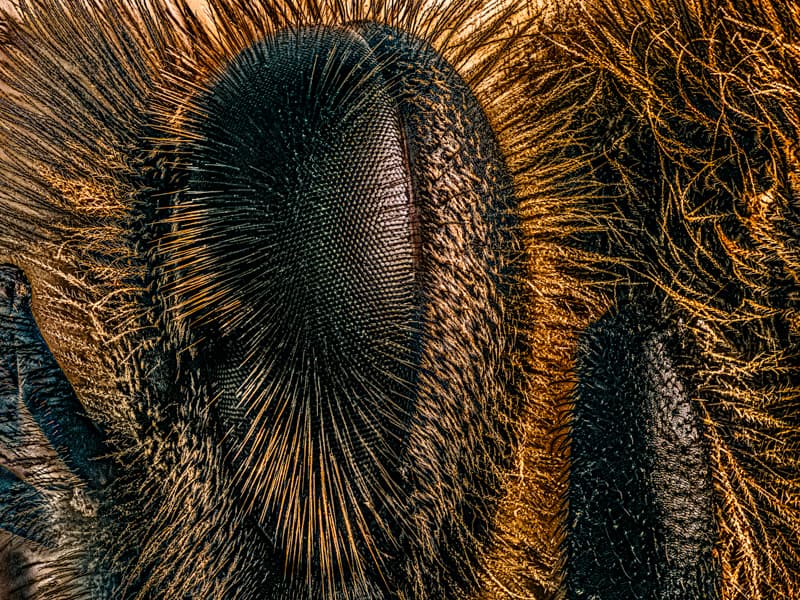
I particularly get pleasure from having the ability to mix inventive and scientific pictures. I used the stand to seize this picture of a honey bee’s eye. Sure, they actually have hairs rising out of their eyes. It was taken at a magnification of 11x; the topic is about 1/8” (3 mm) throughout.
Elements
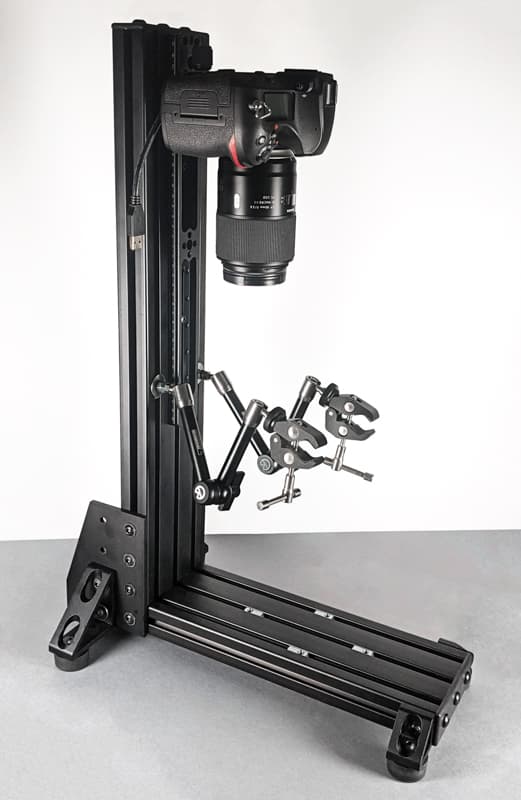
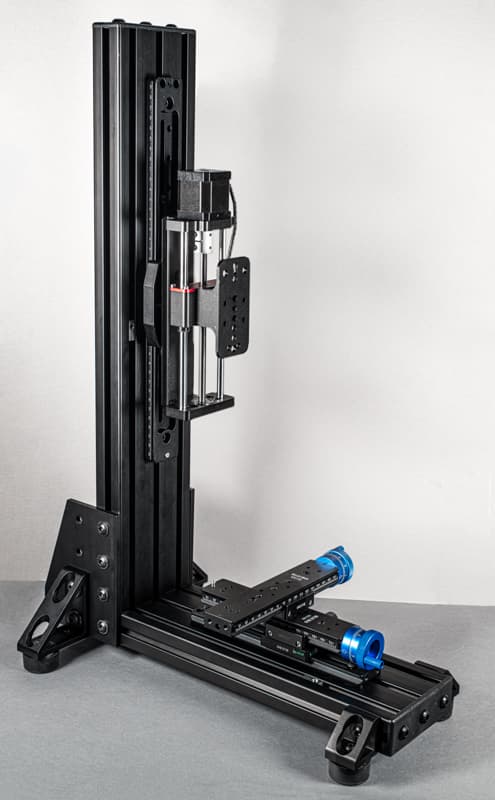
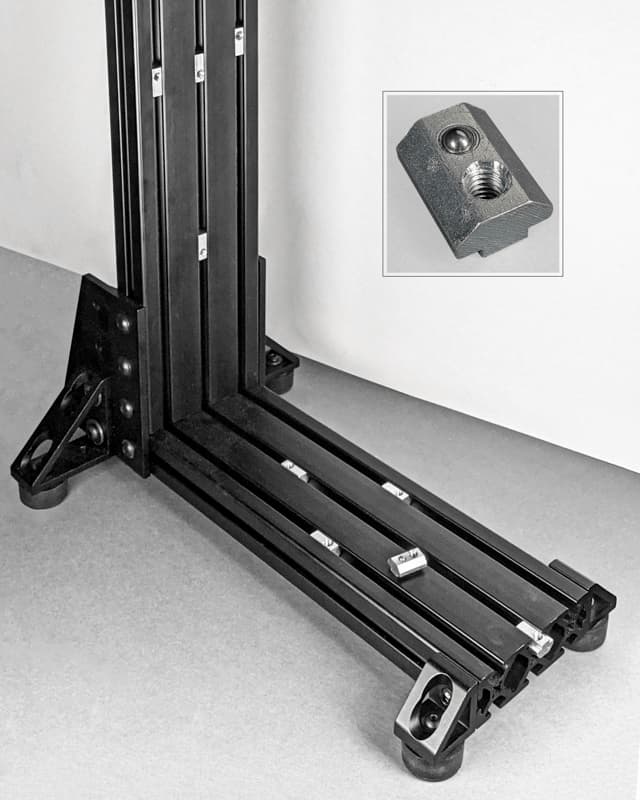
I based mostly the development on T‐slot aluminum extrusions. I connect dovetail rails to make it straightforward to regulate the peak of the digital camera and transfer the topic. The stand is proven in its vertical configuration; the digital camera can be positioned above the topic. The stand will be reconfigured for horizontal use. Sliding T‐nuts within the slots of the stand permit lights and dovetail rails to be connected.
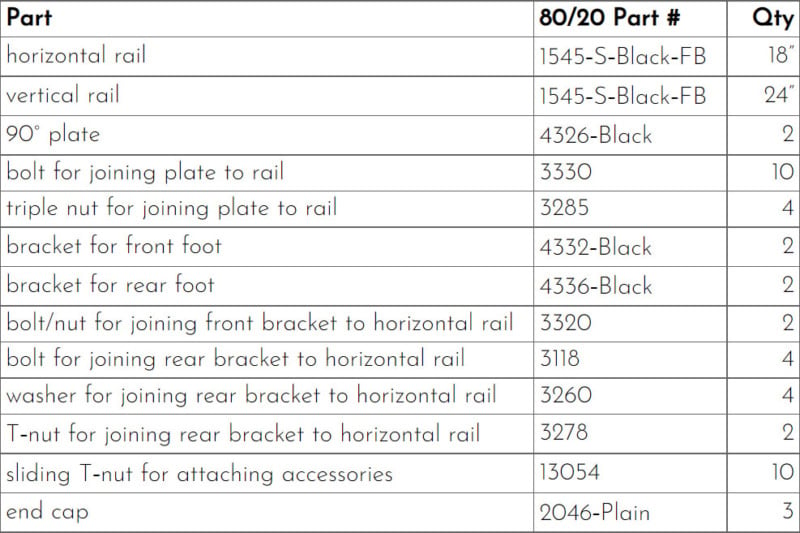
I ordered the extrusions and connecting {hardware} from 80/20. There are different suppliers, however 80/20 has a complete catalog, and for every product they’ve a video on the way to use it. Their customer support has additionally been nice. (I’ve no reference to 80/20 nor every other provider.) The fee for these elements, together with delivery within the US, is about $250. Additionally they have equal elements based mostly on metric dimensions. The rubber ft, and {hardware} to connect them, got here from a ironmongery shop, and you may also get them from Amazon. See step 6 beneath.
Meeting
You’ll want a 3/16” hex key (additionally known as an Allen wrench) to tighten the bolts.
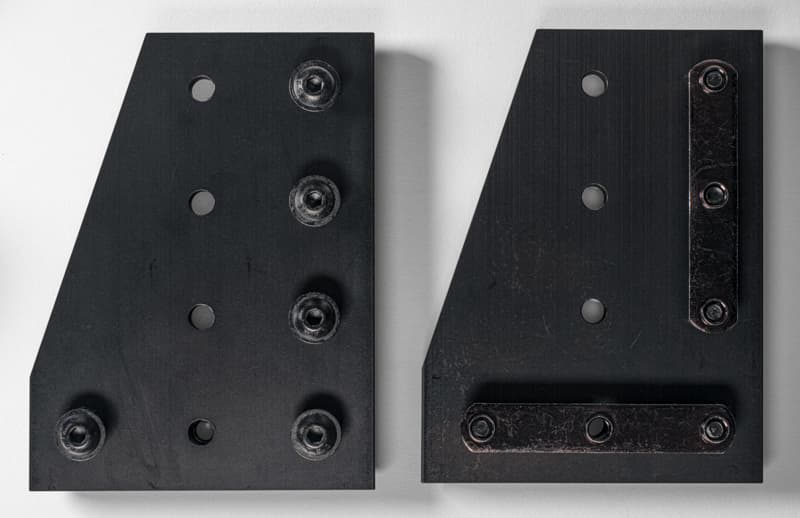
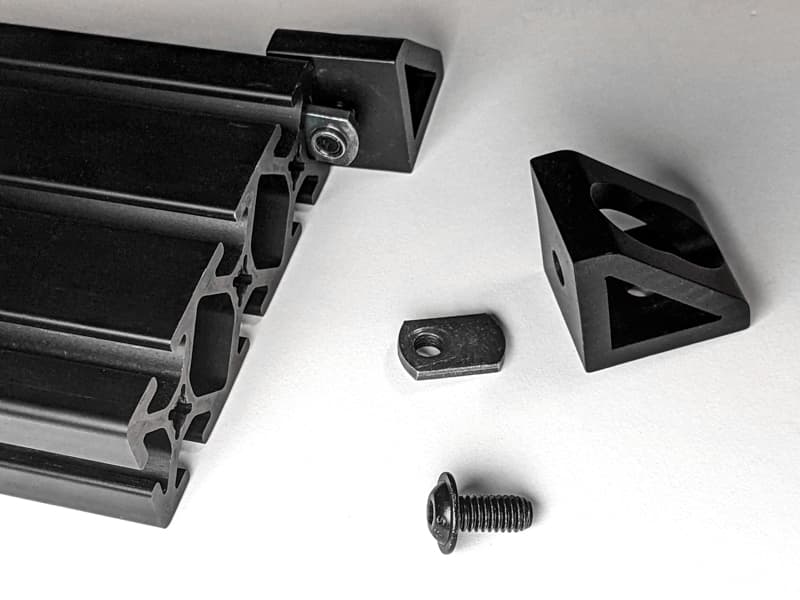
1. Put together 90° plates
Utilizing 5 flange head bolts (#3330) for every plate, loosely connect 2 triple nuts (#3285) based on the determine beneath. Omit the center bolt in every of the underside triple nuts. Be aware that the triple nuts have a flat facet and a facet with rims across the holes; the flat sides of the triple nuts must be towards the plates.
2. Slide 90° plates onto horizontal rail
Slide the plates all the way in which onto the perimeters of the horizontal rail, with the angled facet dealing with the again finish of the rail. Don’t tighten the bolts but.
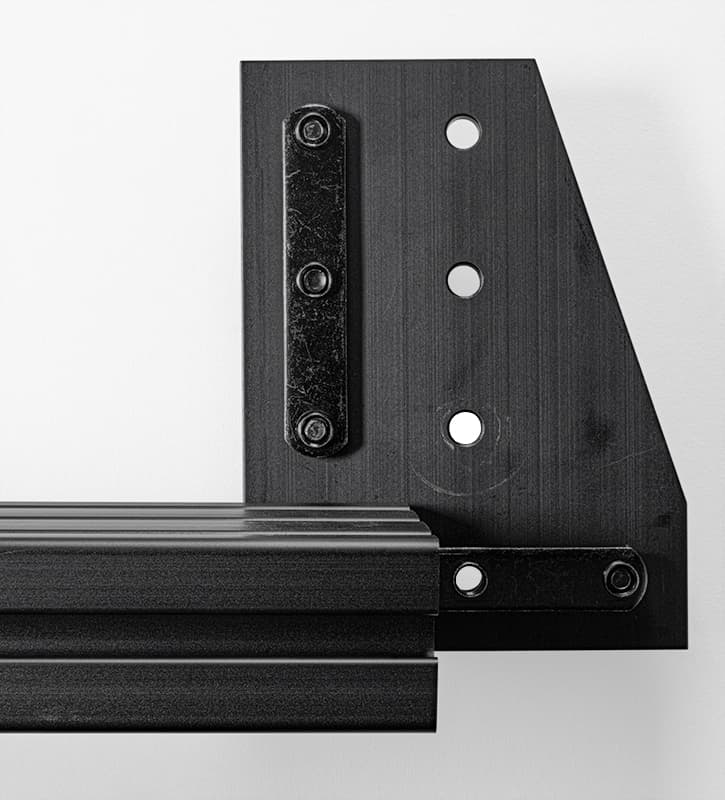
3. Slide vertical rail onto 90° plates
Align the plates with the again of the horizontal rail, and slide the vertical rail down onto the plates. Tighten all bolts.
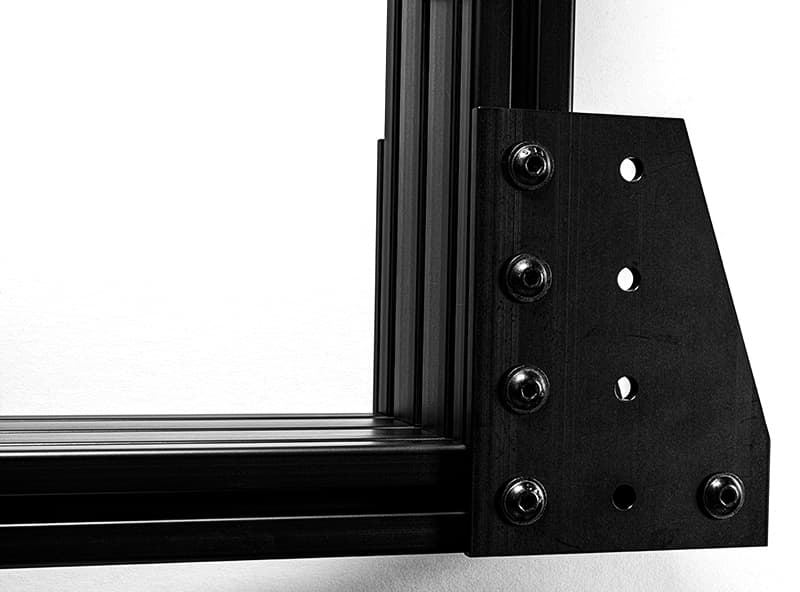
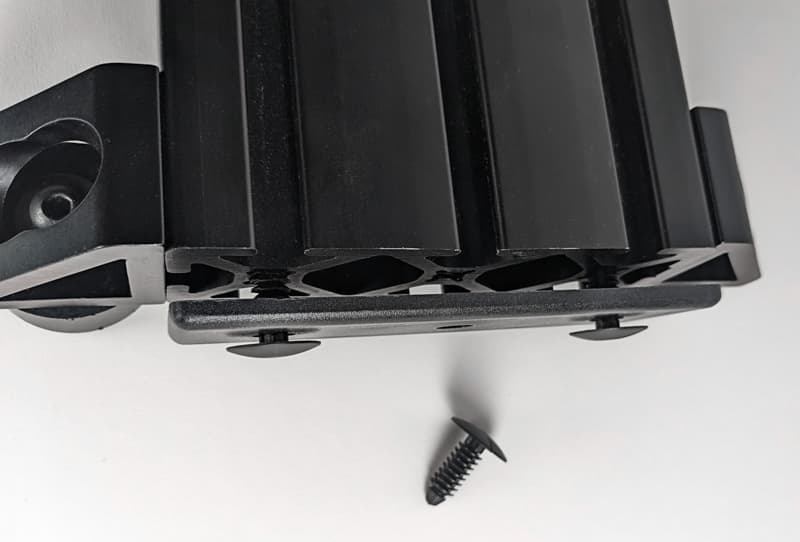
4. Connect rear foot brackets
Insert two 1” bolts (#3118) and washers (#3260) into every of the double foot brackets (#4336).
The underside bolt on every bracket goes into the empty holes on the underside of the plates, and screws into the triple nut already contained in the horizontal rail. The highest bolt goes by means of the plate and is held in place with the nut (#3278); make certain that the flat facet of the nut is dealing with the plate. If the underside bolt doesn’t align nicely with the triple nut, you would possibly must loosen the opposite backside bolts within the plate quickly.
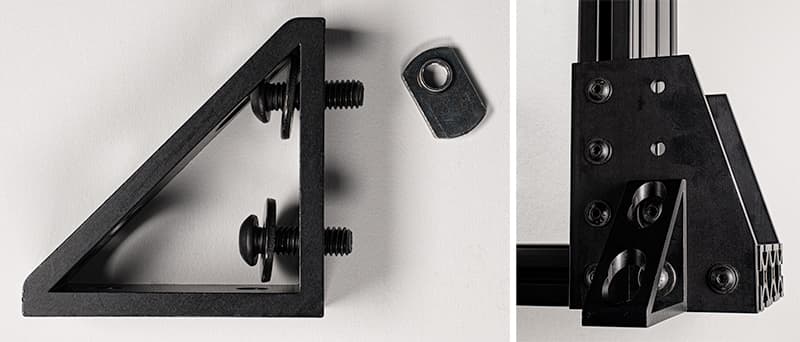
5. Connect entrance foot brackets
Insert a 5/8” bolt (#3320) into every of the single-foot brackets (#4332), and loosely connect the T‐nut that got here with every bolt; make certain that the flat facet of the nut is dealing with the bracket. Slide the brackets onto the perimeters of the bottom on the entrance and tighten.
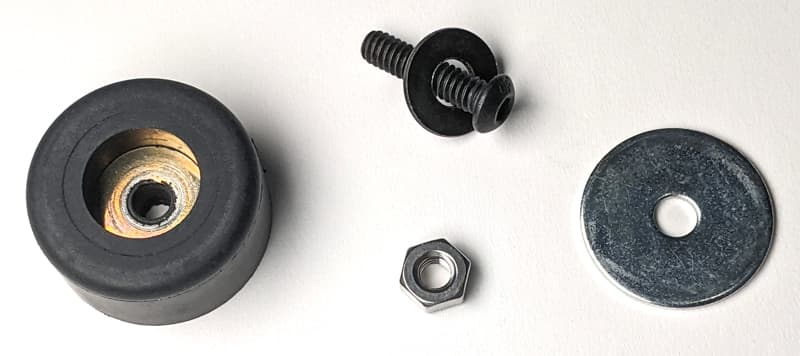
6. Add ft
I take advantage of 1½” diameter rubber air compressor ft. They assist dampen vibration that would wreck your {photograph}. Additionally, they shield your work floor. The holes within the middle of the ft are sized for 1/4” bolts. Connect every foot to its bracket with:
- 1/4‐20 thread button head cap screw (black appears to be like tidier, if accessible)
- Washer (once more, black if accessible)
- 1/4‐20 thread nut
The ft and {hardware} will be discovered on Amazon or at {hardware} shops. The size of the cap screws depends upon the thickness of the ft. For the ft I purchased, one-inch screws have been a bit of bit too lengthy, so I added 1¼” diameter fender washers.
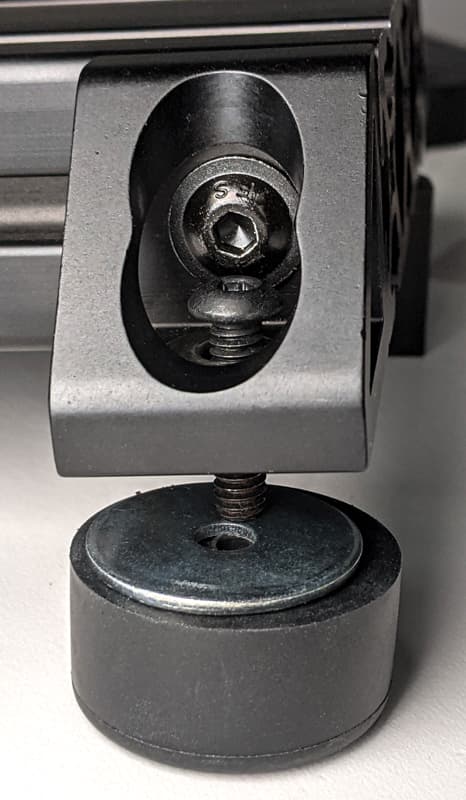
Place the washer within the bracket after which drop the screw down by means of the washer, the underside of the bracket, the fender washer, and the foot. From beneath, contained in the recess within the foot, screw the nut onto the top of the screw. You would possibly want a socket wrench or pliers to carry the nut, along with the hex key for the screw, to get the meeting tightened.
7. Add sliding T‐nuts
The sliding T‐nuts (#13054) match into the T‐slots on the surfaces of the rails. They’re tapped with 1/4‐20 threaded holes for attaching equipment. Every has a spring-loaded ball bearing to carry it in place; this retains the unused ones from rattling about. I often put three within the middle slots for attaching dovetail rails and clamps and staging for the subject material. I put one in both sides slot for positioning lights. You’ll be able to even put them within the slots on the sides of the rails.
8. Connect finish caps
Connect the top caps (#2046‐Plain) on the highest of the vertical rail and at every finish of the horizontal rail. The top caps are held on with friction match studs that go into holes within the ends of the rails.
Dovetail Rail and Clamp
A dovetail rail makes it straightforward to regulate the peak of the digital camera. These rails have a dovetail cross-section, and you will get clamps that let you simply place a digital camera anyplace alongside them. These equipment will be very dear, however the Haoge and Sunwayfoto manufacturers, accessible on Amazon, are glorious and fairly priced. They’re suitable with Arca‐fashion elements, and a few of their merchandise are about 1/3 the worth of comparable big-name manufacturers.
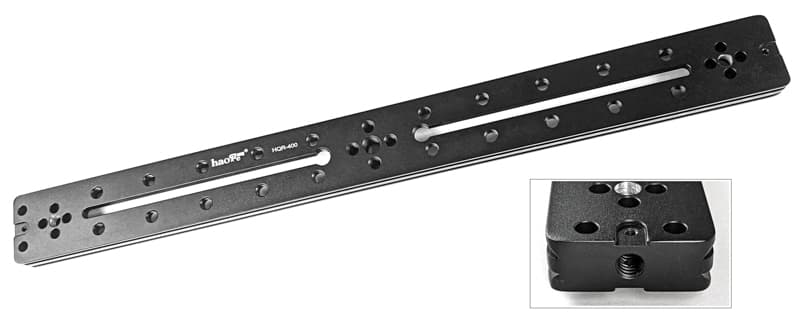
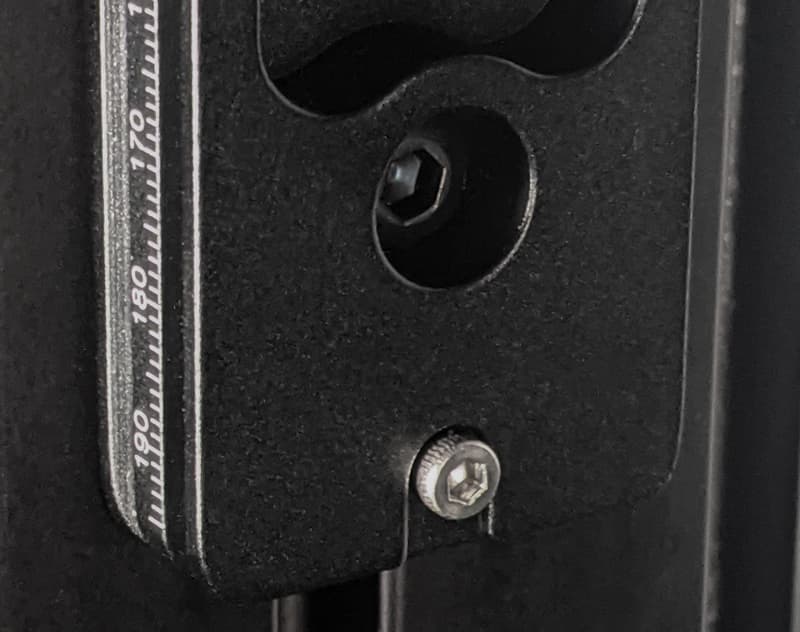
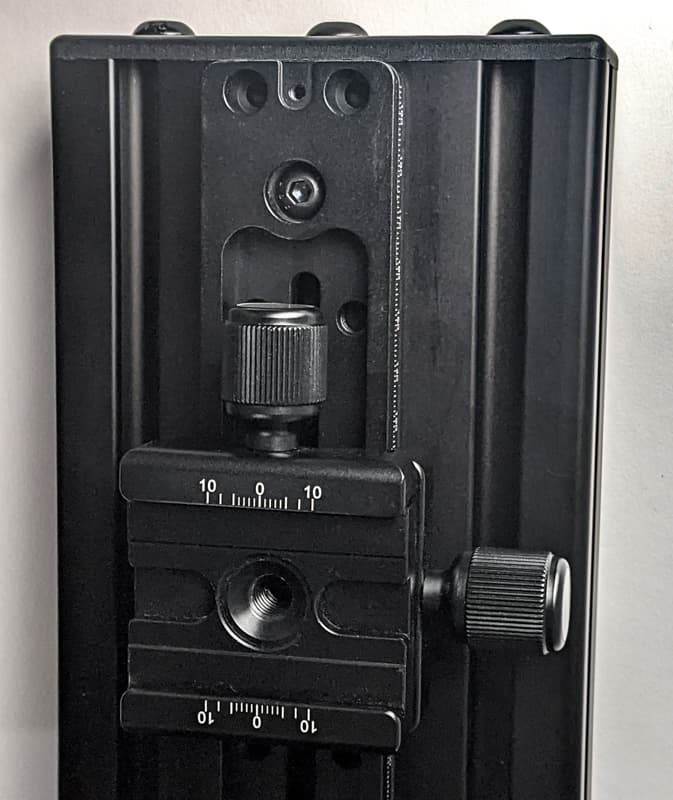
Connect a Haoge 400mm twin dovetail rail (Haoge HQR‐400) onto the vertical a part of the stand. Twin (additionally known as double) rails have dovetail profiles on each the highest and backside, so you possibly can clamp onto both face. Use two or three screws to connect the dovetail rail to sliding T‐nuts within the stand. By placing the highest floor of the dovetail rail towards the vertical stand rail, the screws can be beneath the floor, and never intrude with the positioning of a clamp.
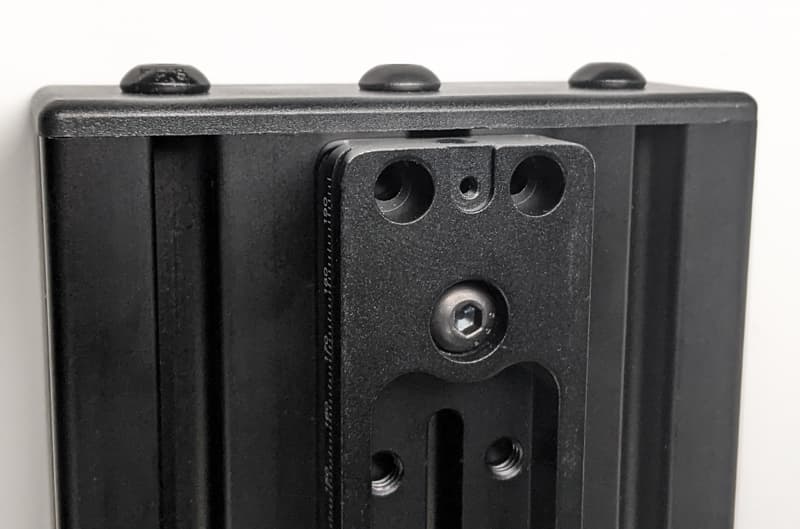
The dovetail rail comes with cease screws. Use one on the backside to maintain the digital camera from by chance sliding off.
Use a double clamp (Sunwayfoto DDB‐53) to place the digital camera on the dovetail rail. One set of jaws clamps onto the dovetail rail, and the opposite clamps onto a fast launch plate on the underside of your digital camera. You’ll be able to simply regulate the placement of the clamp on the dovetail rail, and thus set the peak of the digital camera above your subject material.
Lastly, connect a fast launch plate to the underside of the digital camera…
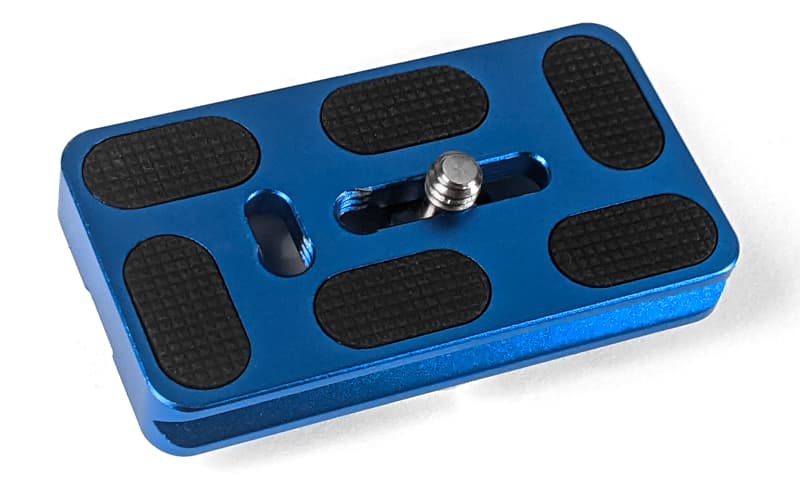
…and also you’re performed.
In regards to the writer: David Garnick’s inventive pictures is held in public, company, and personal collections. He collaborates with museums to create imagery for exhibitions, and produces, curates, and judges exhibitions of up to date pictures. He additionally works with science labs to assist them enhance and prolong their imaging capabilities. You’ll be able to view his weblog and a few of his work at davidgarnick.com. This text was additionally revealed right here.