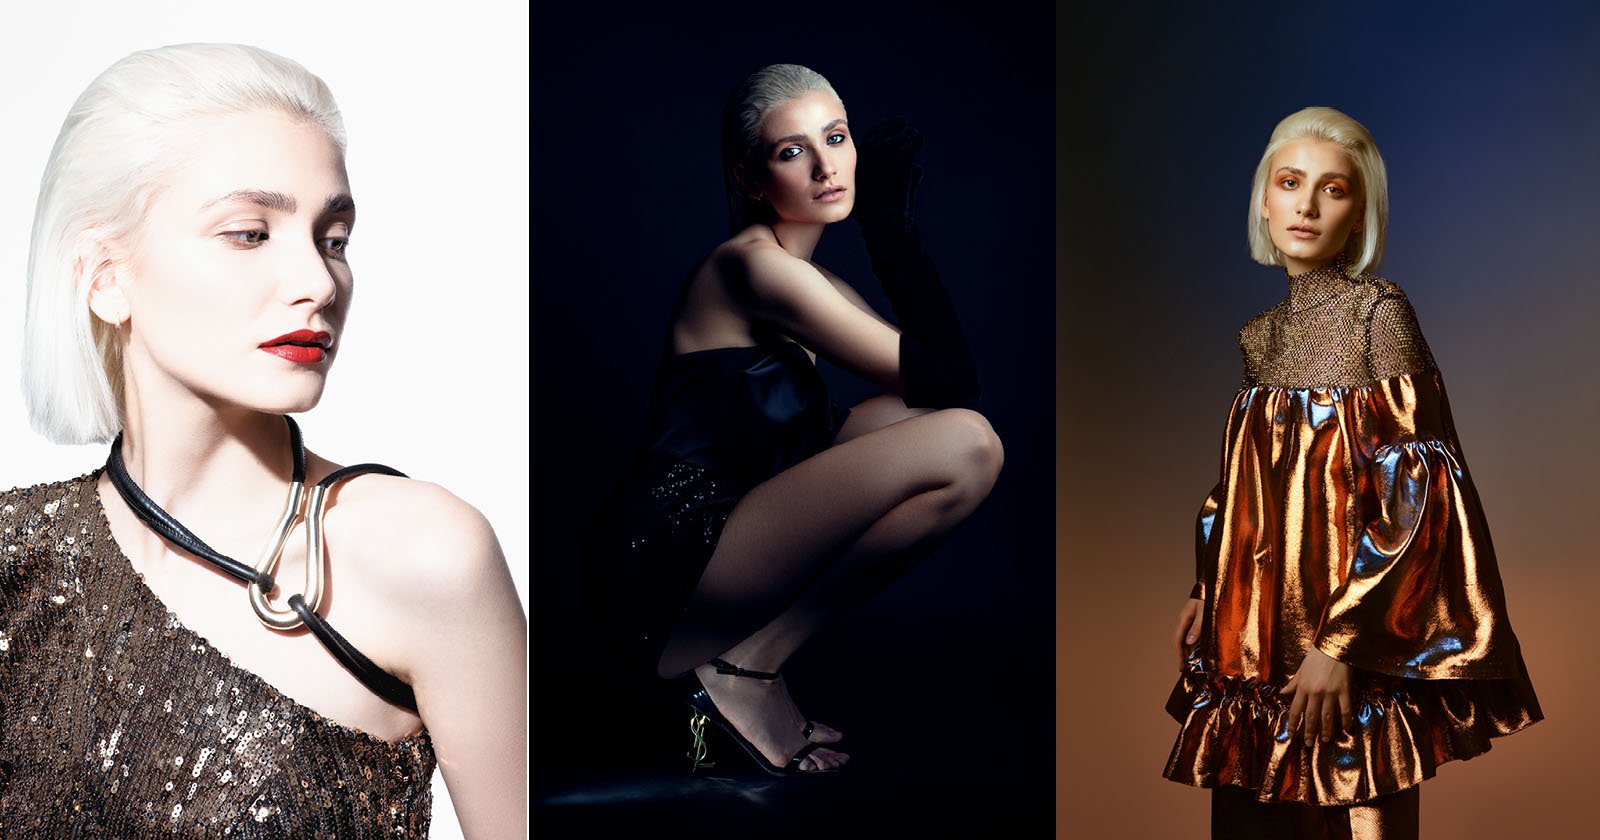

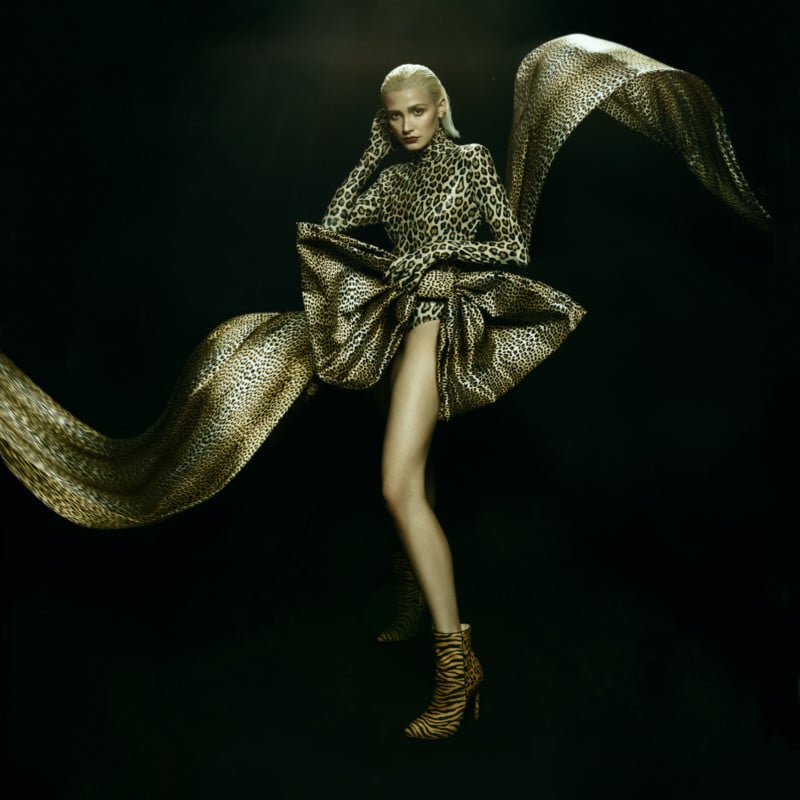
Creating an evenly lit background will be trickier than one would suppose, however is a talent that each photographer ought to grasp. However with the best tools and information, it will get a lot simpler to seize a pure white, black, or coloured gradient background in-camera with out the necessity for heavy Photoshop cleanup in publish.
On this article, we’ll talk about among the greatest methods for correctly lighting a backdrop to realize these clear and balanced seems to be.
On the subject of lighting a background, there is a bit more method required than simply hanging up a chunk of paper. Whereas the precise sort of background alternative is a private desire, it’s at all times a good suggestion to know the way to create completely different types so that you’re at all times ready ought to a shopper request one thing particular.
There are numerous business assignments (resembling E-commerce) that require a wonderfully white background due to how the picture will likely be printed on paper or clear web sites with textual content. Conversely, the picture might have to be shot towards a strong black for a similar purpose.
Typically, it’s at all times in a inventive’s greatest curiosity to correctly gentle and expose their backgrounds since it would save a lot effort and time with their retouching efforts. An beneath (or over) uncovered background with uneven highlights goes to look dangerous no matter the subject material.
Desk of Contents
Creating A Stable White Background
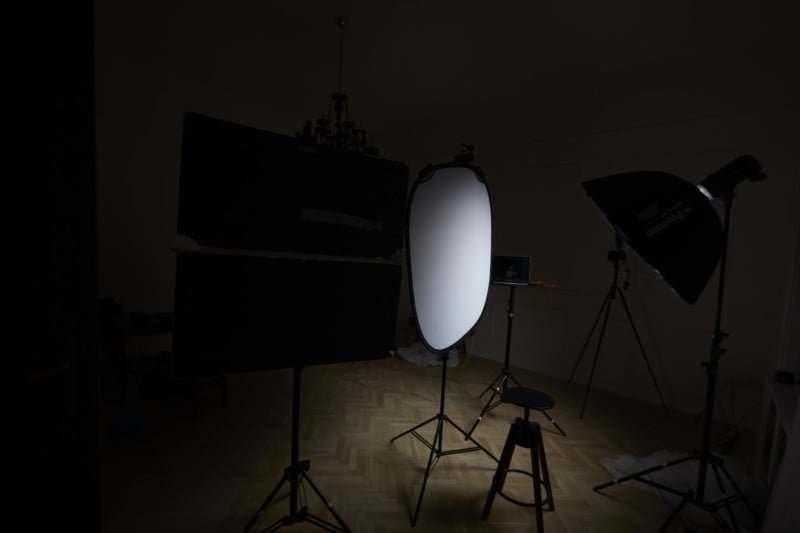
Making a strong white background is arguably one of many easiest ones on this article, but many photographers can wrestle with it. There are some things that may simply go mistaken when taking pictures a white background – The background could also be overexposed, underexposed, lit too exhausting, and/or lit erratically. Let’s tackle every one by contemplating the photographs under.
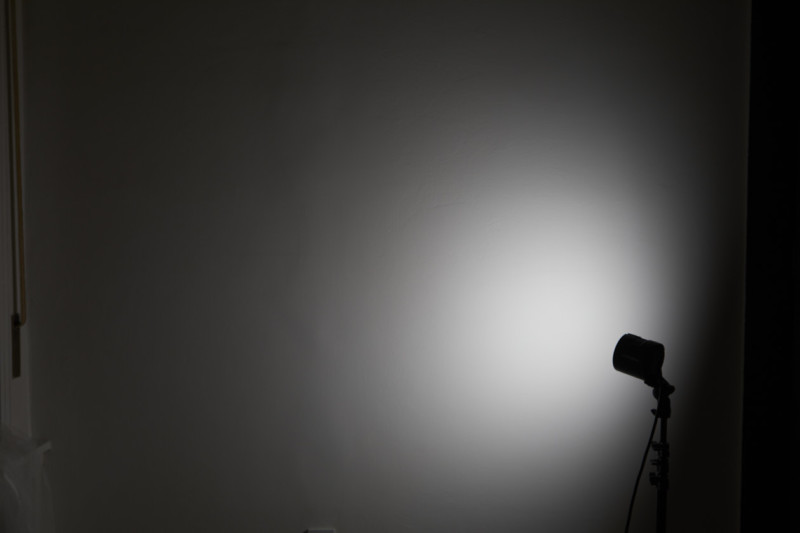
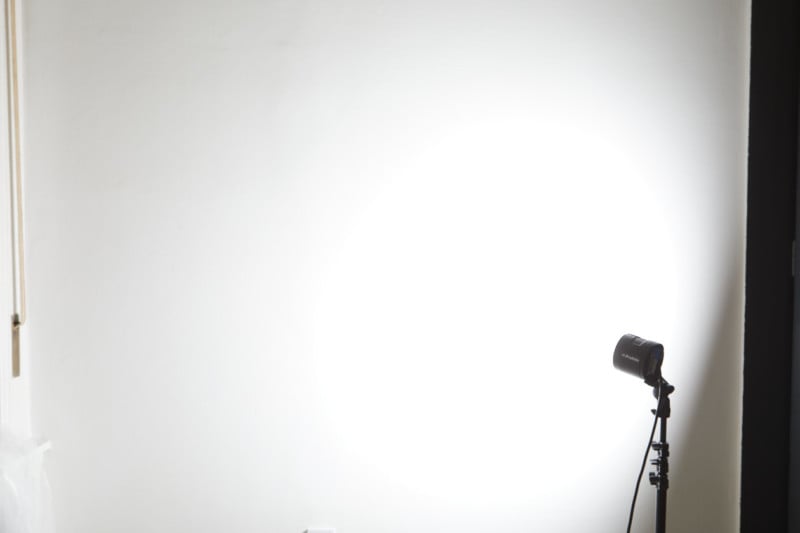
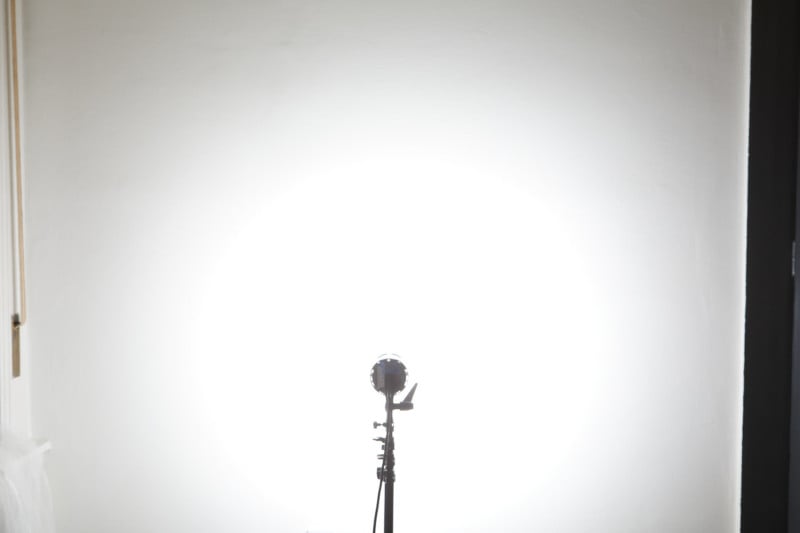

It’s straightforward to suppose {that a} completely white background is only a huge overexposed blob, so the instinctive transfer could also be to easily blast it with gentle. But when we do this, the background will begin appearing as a light-weight supply and messing with our total picture. Particularly if the background gentle is basically highly effective as it might even create undesirable flare which can lower the general picture high quality and element by rather a lot.
One other subject that one might encounter is the overexposed white turning right into a nasty magenta or an unflattering inexperienced that may seem whether it is underexposed. Whereas these aren’t big points in digital pictures because it can be fastened in publish, it may be a significant ache when taking pictures movie (as some shoppers request) and can nonetheless be annoying to have to repair in each picture after the very fact with digital. To keep away from this subject, make sure you at all times set the sunshine energy from low to excessive and cease the place the background is the best tone.
Additionally, watch out for the mistaken gentle positioning. Your purpose have to be to evenly illuminate the entire background and that is greatest finished with a big gentle supply resembling an umbrella or a magnificence dish. Keep in mind to provide sufficient area between your topic and the background to keep away from gentle flares. Usually you’ll need at the least 4-5 toes from the background for this.
Creating A Stable Black Background
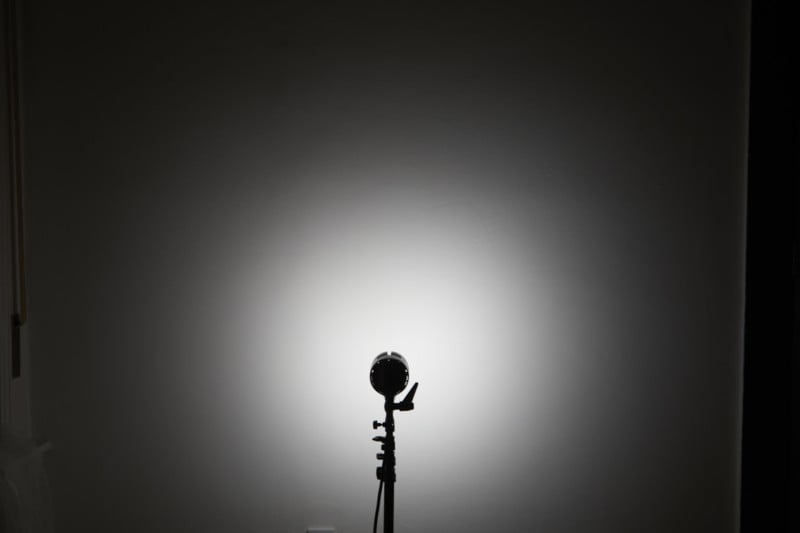
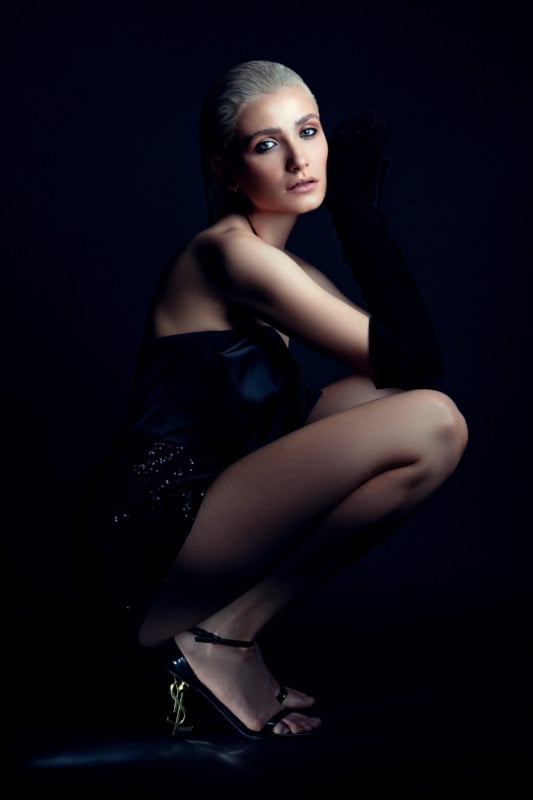
Photographing a clean black background is the alternative of making a strong white one. It requires switching from overexposing to underexposing.
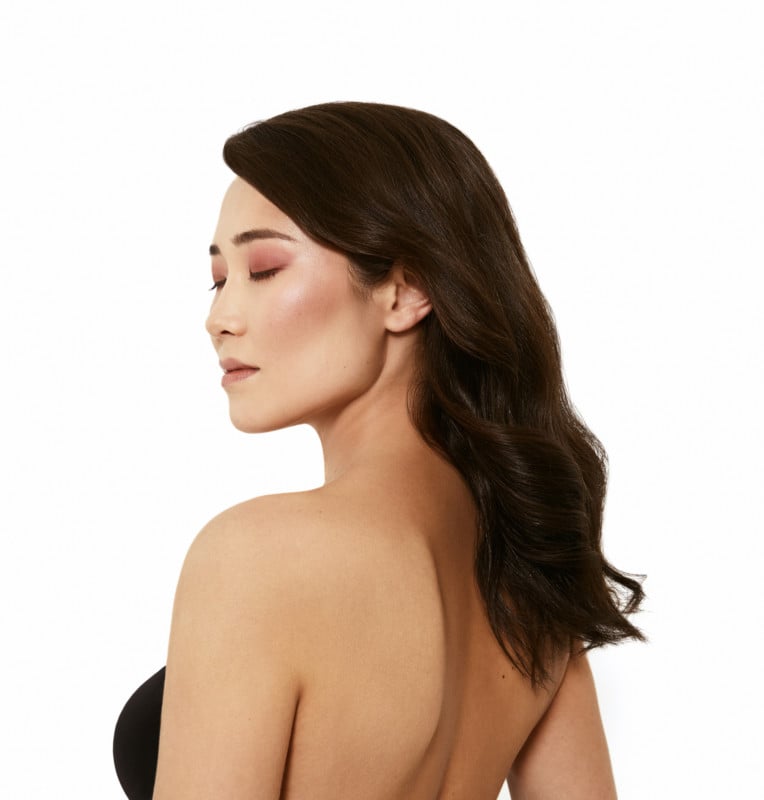
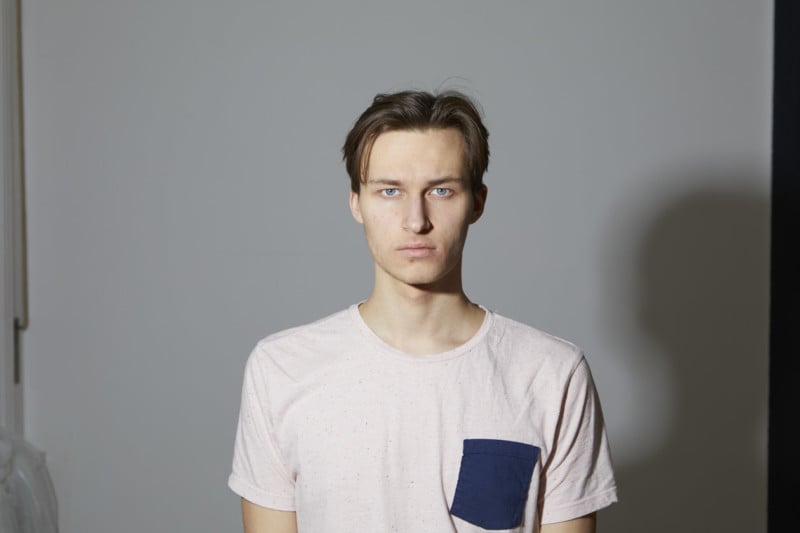
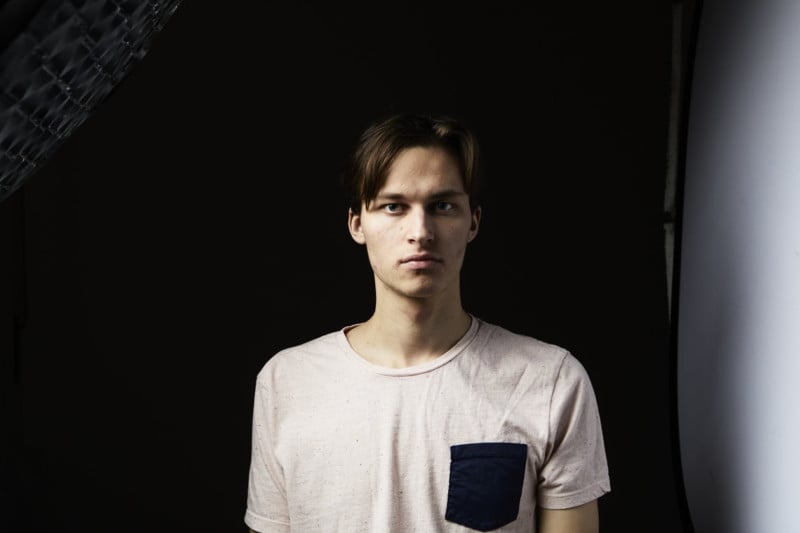
Whereas it might not apparent, a black background can really be created when taking pictures towards a white wall. Within the portrait under we use a white wall for the primary image for instance how doing that is doable virtually wherever. The picture was finished with a easy straight-on flash that appears unflattering and doesn’t obtain our purpose of getting a black background.
To create the strong black background we have to be certain there isn’t any gentle hitting any of the close by surfaces and reflecting again into the digital camera (No gentle can hit the backdrop). The primary piece of substances helpful for it is a black “flag” or a chunk of black styrofoam (V-flat) to dam among the gentle.
Moreover, a grid was added to the softbox to create delicate flattering gentle, but additionally to regulate it so it solely hits the topic’s face. Including some fill gentle will brighten up the shadows, however it may be finished in a manner in order that the background stays underexposed. One of the best ways to realize that’s by putting a reflector or white styrofoam.
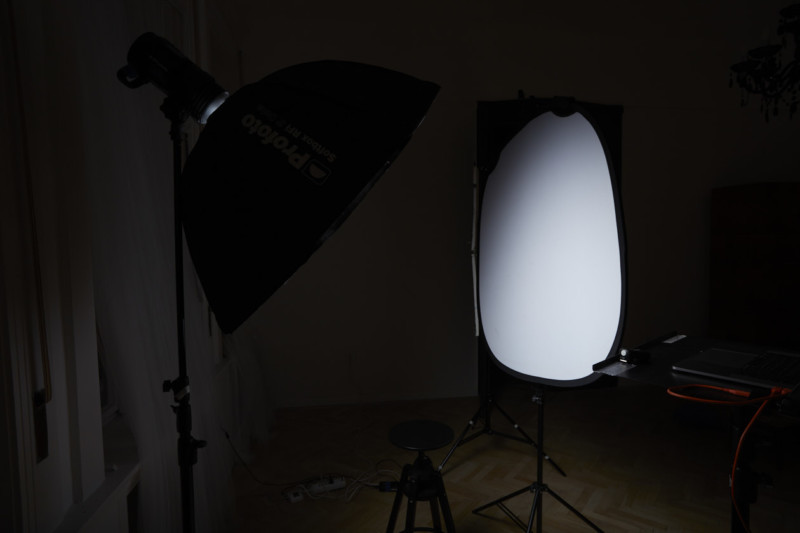

After all, an easier manner could be to make use of a black backdrop, however even then it will probably nonetheless replicate some gentle, so we nonetheless have to be sensible with our lighting to make it work. Lighting black backgrounds will be more difficult as a result of the sunshine is eliminated as an alternative of added (one thing that not all photographers know the way to do properly). Helpful ideas and instruments to take away gentle are growing the gap of the topic from the background, utilizing grids to regulate the sunshine unfold, flags to dam and channel, and black styrofoam boards (V-Flats).
Each time photographing somebody/one thing on a strong black background, utilizing a grid on the lights is one of the best place to start out. So as to add to that, it’s a good suggestion to make it possible for each bit of sunshine exiting the flash is managed so there isn’t any bounce taking place. This implies flagging lights, including further grids/snoots, and even taping over them to lower any probability of sunshine spills.
The final purpose is to create good gentle on the topic whereas additionally defending the background from it. In a big studio, this may be finished by merely shifting the mannequin farther from the backdrop. But when a big area is just not obtainable, controlling and contouring the sunshine like that is the one manner.
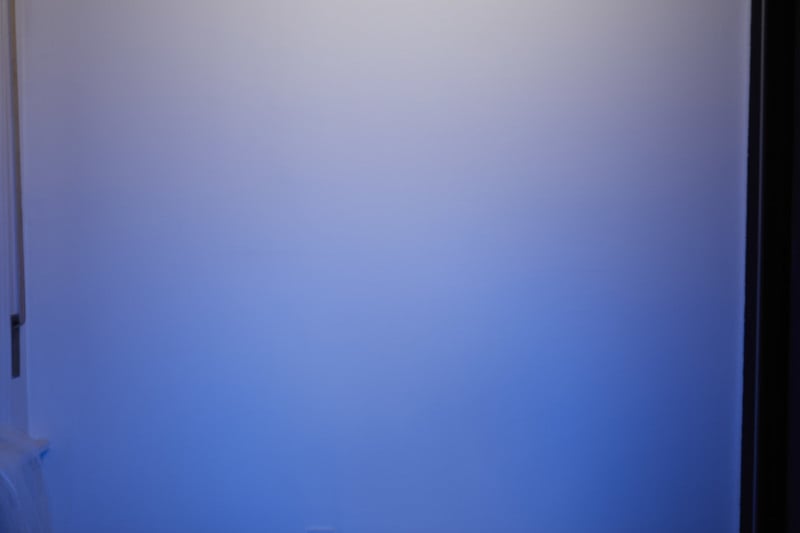
Making a Gradient Background
Making a balanced gradient background would require good information of the inverse sq. legislation. Whereas it’s will be deceptive so far as calculations go, the idea of inverse sq. legislation is related for this example. We are going to cowl two instances of making gradient backgrounds: the place it gradates into darkness, and the place it gradates into brightness.
Additionally it is doable to have two colours mix into one another, however that’s pretty easy to determine as soon as an understanding of shade gradations into black and white is fashioned.

Coloration To Black
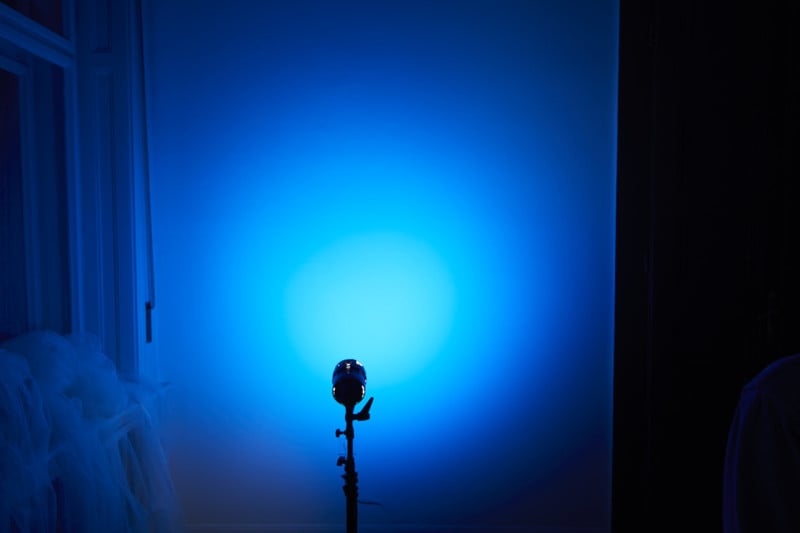

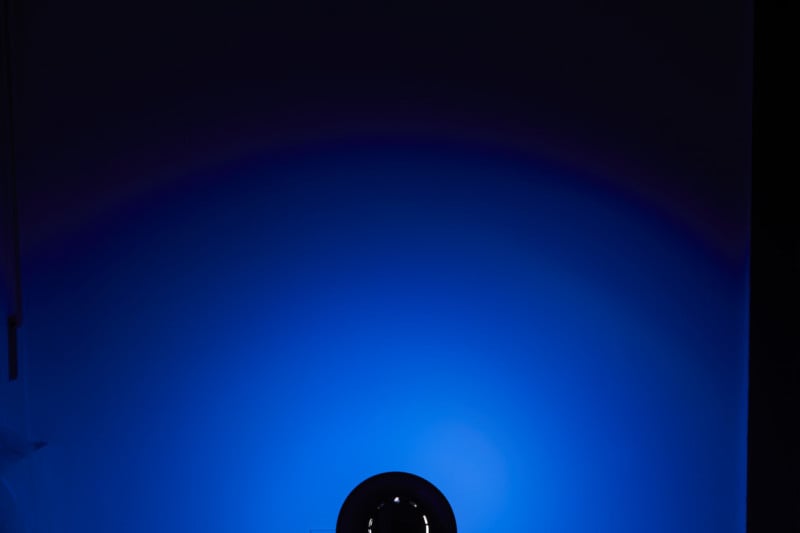
A gradient to black is solely when a vivid splash of shade turns into darker and fades out easily. Many photographers will instinctively place their naked gentle immediately subsequent to a wall and suppose it would create a clean outcome, nevertheless, when the sunshine supply is positioned too shut you will notice each imperfection within the backdrop. Utilizing a tough and uneven gentle supply is just not very best for this software.
What does work, is putting a tough reflector which makes the sunshine supply bigger, after which diffusing it. Relying on the kind of gradient you need, you need to level your gentle at an angle that’s greatest suited to the necessity of the mission. For instance, if I would like a pure again backdrop going right into a darkish blue, I’ll intention my gentle downwards in order that there isn’t any spill.
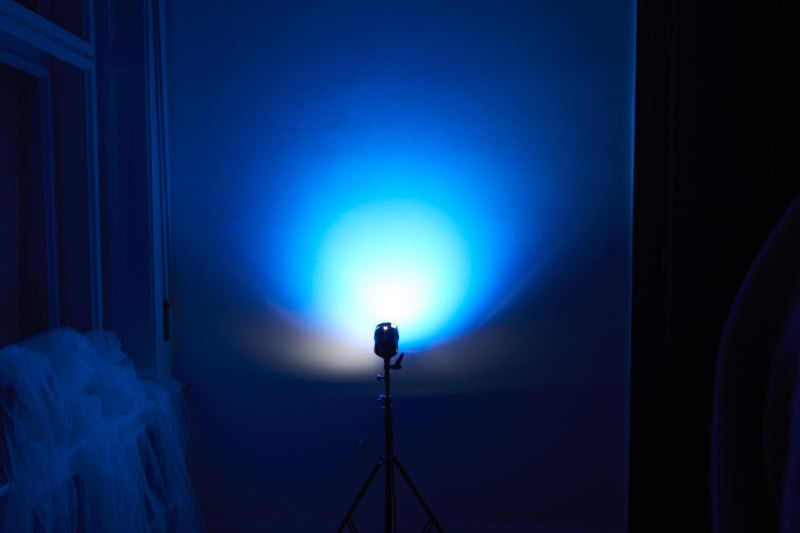
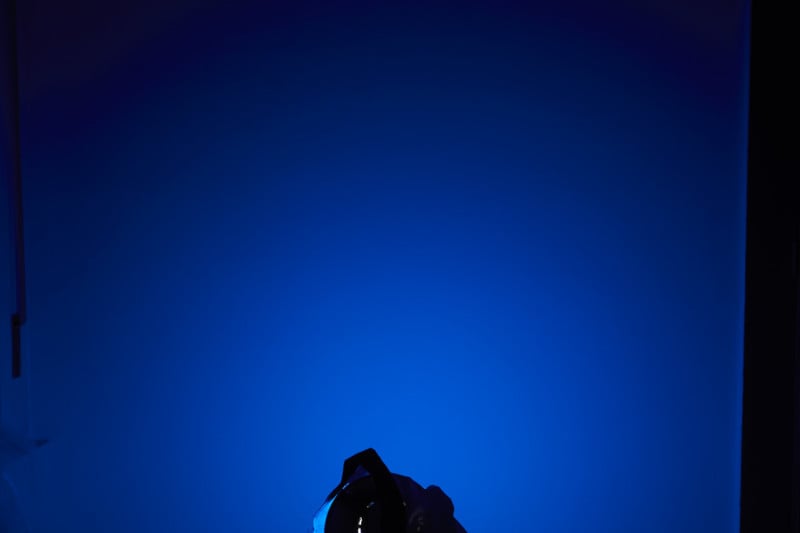
If, nevertheless, the purpose is to transition from a vivid blue right into a darker tone of blue, merely intention the sunshine increased. Experimenting with these positions is one of the best that may be advised right here as each photographer (and shopper) could have a distinct desire or want.
Coloration To White
Whereas uncommon, there are conditions the place the shopper wants the backdrop gradient to maneuver from shade to white. This may be fairly troublesome to do however is a unbelievable talent to have in your bag if the request ever comes up. Particularly since some shoppers favor a gradient that fades into white as vivid footage usually do higher than darkish ones with regards to branding.
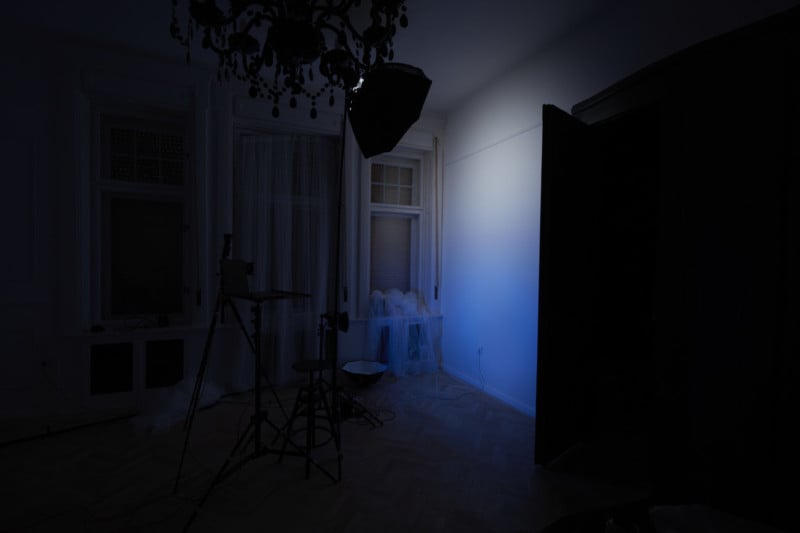
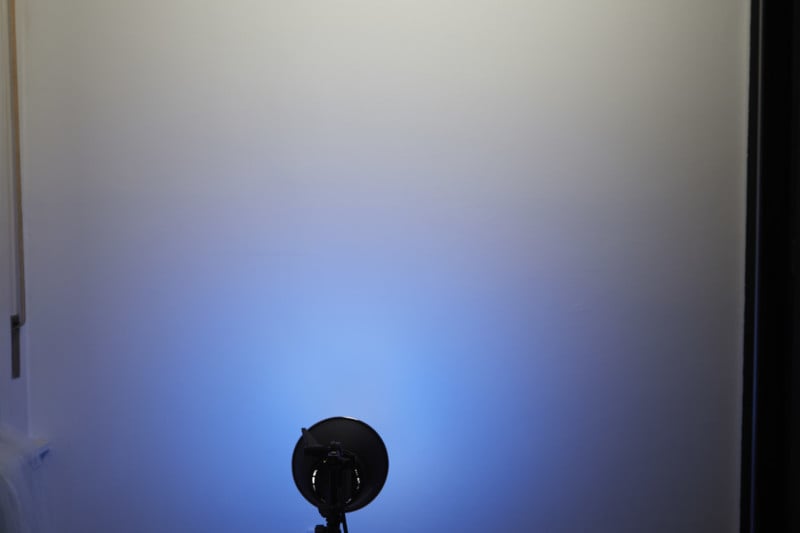
In an effort to create a gradient of shade into white, two gradient setups are wanted: a white one and a coloured one. The gels will fill within the shadow created by the white gentle, so it’s best to place the white gentle first. Then one thing like a gridded octabox will present sufficient softness to create an excellent gradient, whereas a grid will be sure that the sunshine unfold is managed.
Place it pretty near the wall, remembering to concentrate to the precept behind inverse sq. legislation to get the correct quantity of falloff. Then, place the coloured gel and easily regulate the facility in order that it might gently combine with white.
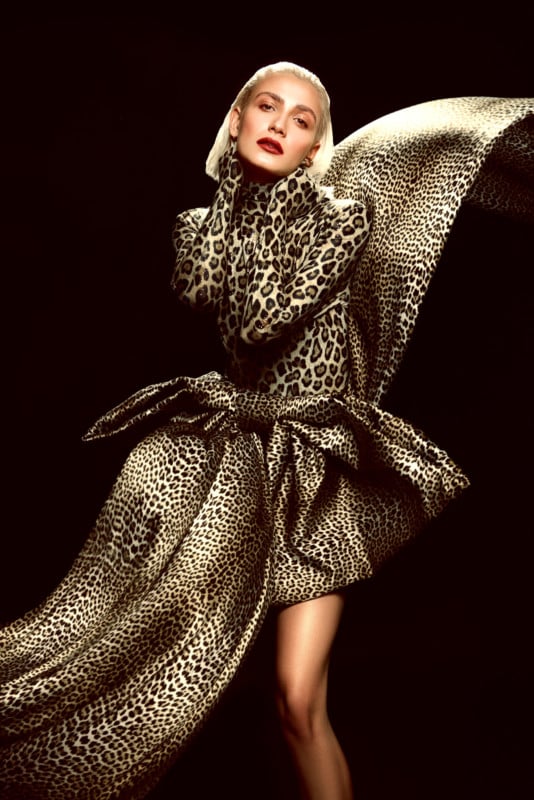
Mastering these lighting setups will assist photographers have the ability to gentle for almost any state of affairs {that a} shopper or private mission can demand of them, and can assist save numerous hours of retouching clear up on the laptop after the very fact.